How to share an issue?
-
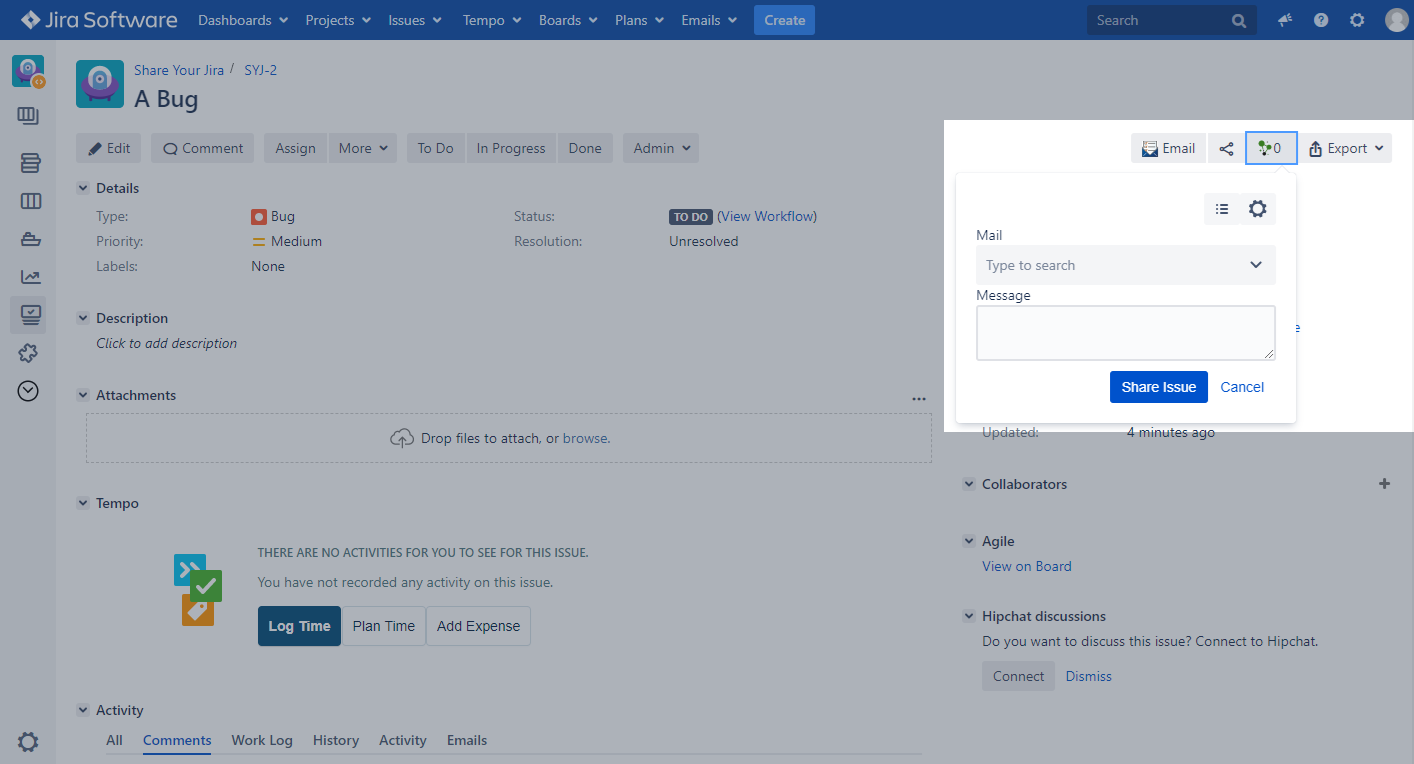
Open the issue you want to share
-
Click on the "Share" button
-
Click on "Share Issue" to do a quick share, without any configurations
If there is no "Share" button, please check the configuration. Take a look on the
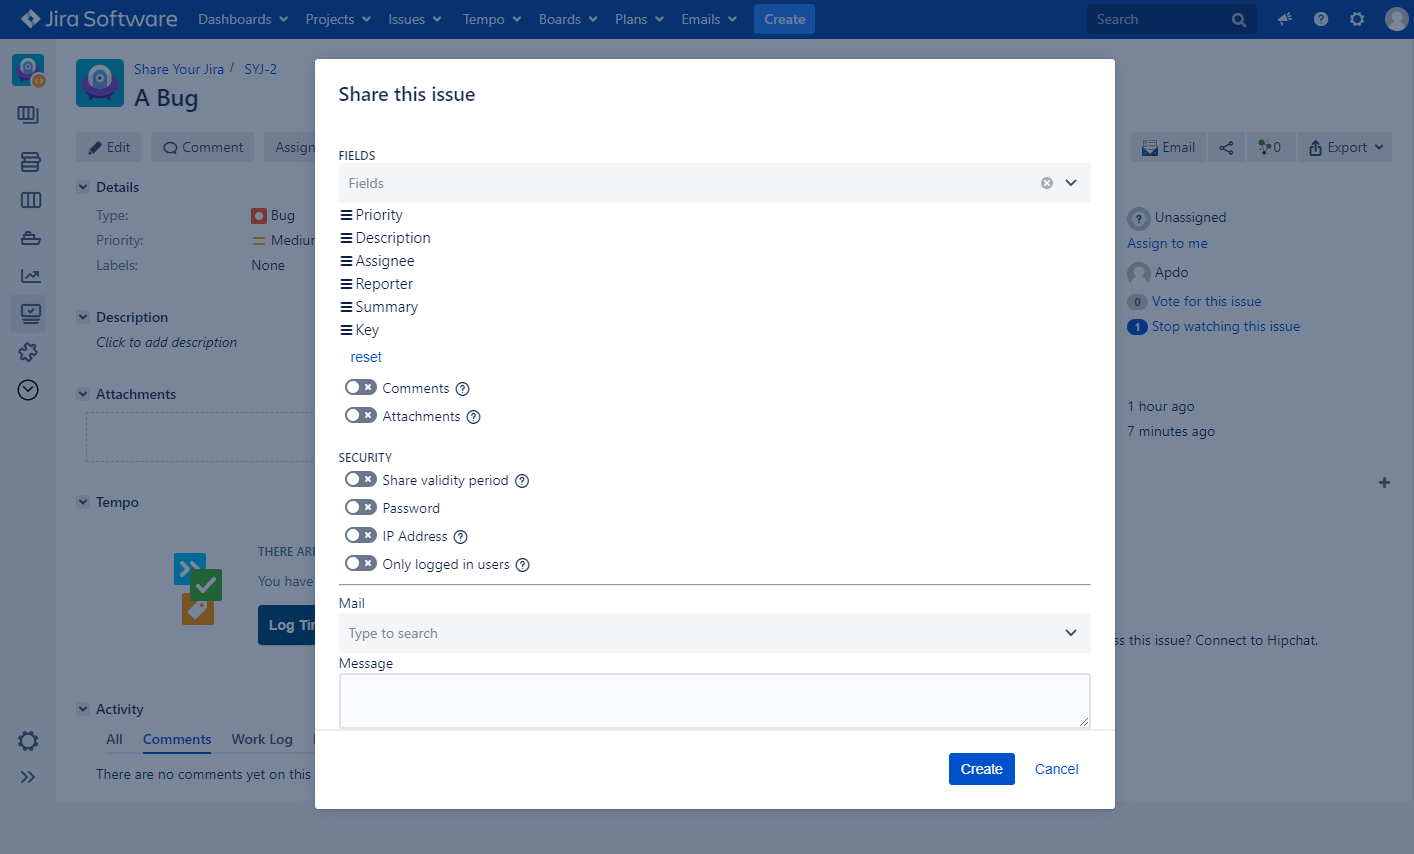
Set up your share:
-
Define the fields you want to share, by typing in the names of the fields
-
Define the order of fields via drag and drop
-
Choose attachments which shall be shared
-
Choose comments of particular user groups to be visible in the "Share"
-
Define, where to sent the public link:
-
Enter a username for Jira users
-
Or an email for external access
-
You are also able to set restrictions:
-
Define when / how long the "Share" should be active
-
Define a password to secure the access
-
Define an IP address which should receive access
-
Limit the access to logged in users only (Otherwise also non JIRA users are able to access)
-
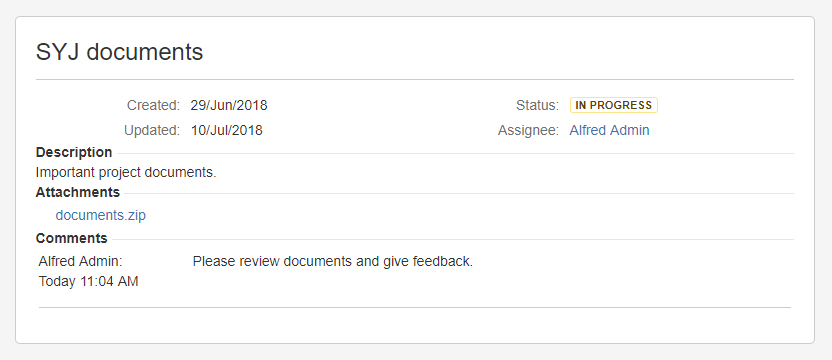
Afterwards a unique link will be generated, which can be copied and sent. The shared issue is a dynamic reflection of the current status, so the unique link doesn’t have to be renewed.
-
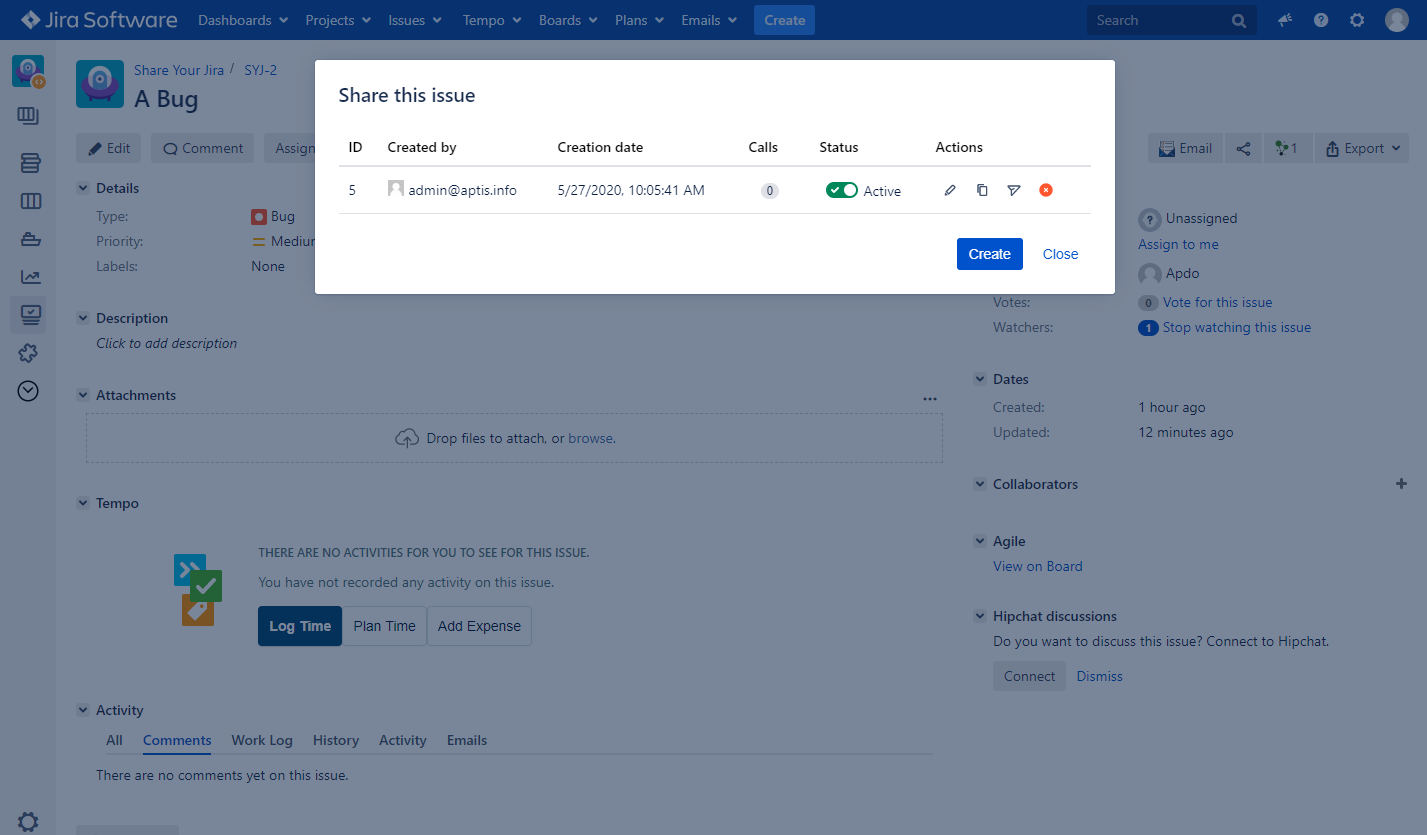
By clicking on the pen icon, the share can be adjusted
-
By clicking on the copy icon, the link is getting copied to the clipboard
-
By clicking on the share icon, the link can be send to external mail adresses
-
By clicking on the delete icon, the link can be deleted
-
By unchecking the activate toggle, the link can be deactivated
-
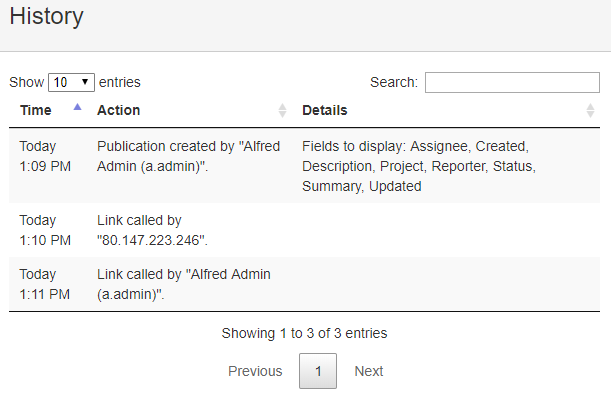
By clicking on the amount of calls, the history of the share can be accessed
-
How to share a filter list?
-
Open the filter list you want to share (Jira default filter are excluded) – Be sure that the filter list is saved. The issues in the filter list have to be in projects with activated share function.
-
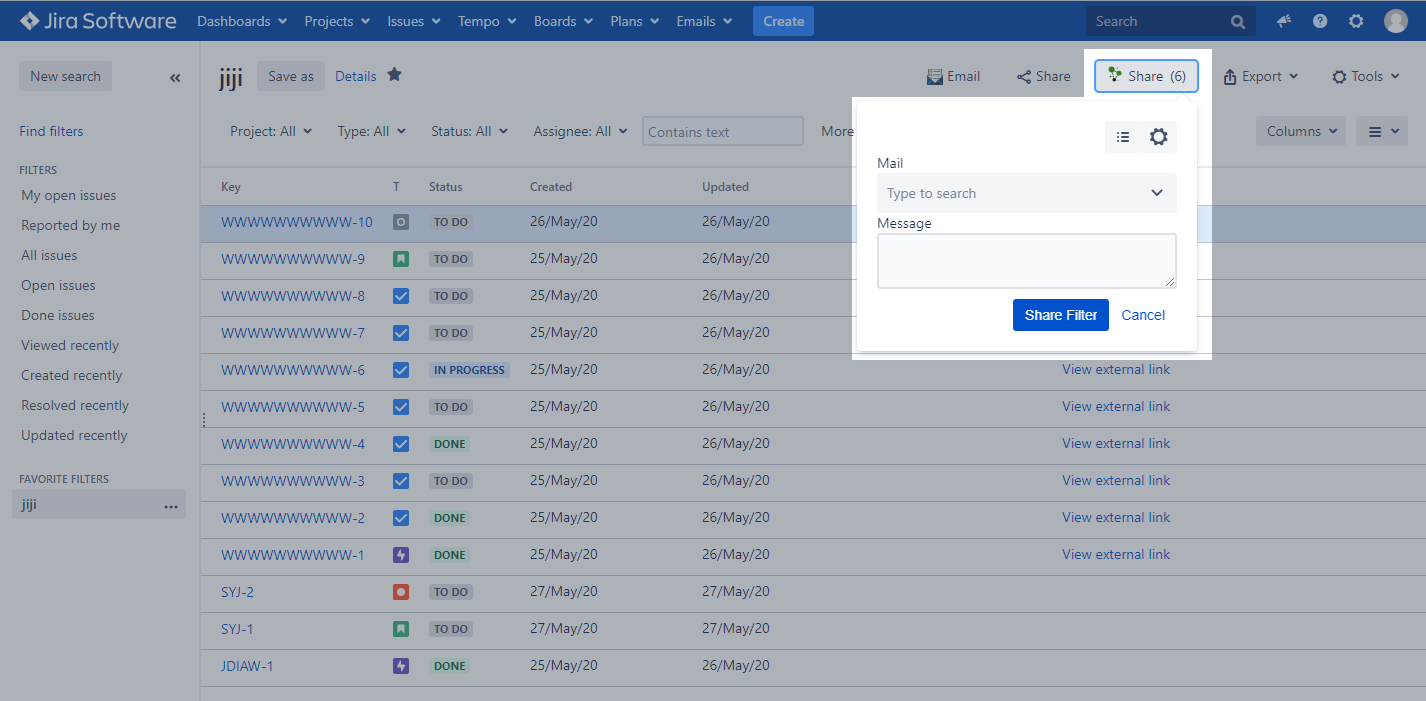
Click on the "Share" button.
If there is no "Share" button, please check the configuration. Take a look at the
Set up your share:
-
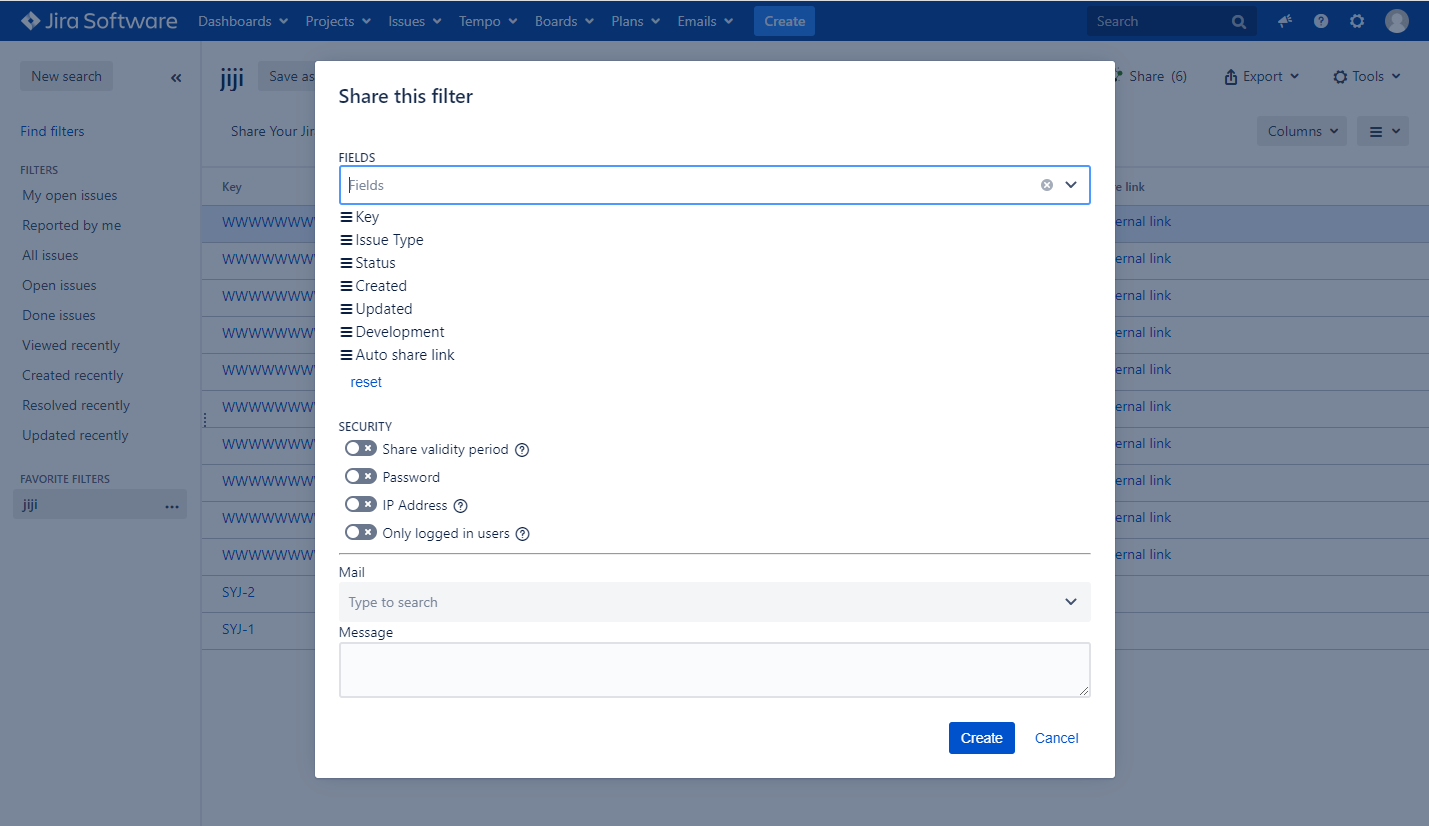
Define the columns you would like to display by typing in the names of the fields
-
You can reorder the fields via drag and drop, to define the order of columns in the shared view
-
Define, where to sent the public link:
-
Enter a username for Jira users
-
Or an email for external access
-
You are also able to set restrictions:
-
Define when / how long the "Share" should be active.
-
Define a password to secure the access.
-
Define an IP address which should receive access.
-
Limit the access to logged in users only (Otherwise also non JIRA users are able to access)
-
Afterwards a unique link will be generated, which can be copied and sent. The shared issue is a dynamic reflection of the current status, so the unique link doesn’t have to be renewed.
-
By clicking on the pen icon, the share can be adjusted
-
By clicking on the copy icon, the link is getting copied to the clipboard
-
By clicking on the share icon, the link can be send to external mail adresses
-
By clicking on the delete icon, the link can be deleted
-
By unchecking the activate toggle, the link can be deactivated
-
By clicking on the amount of calls, the history of the share can be accessed
-
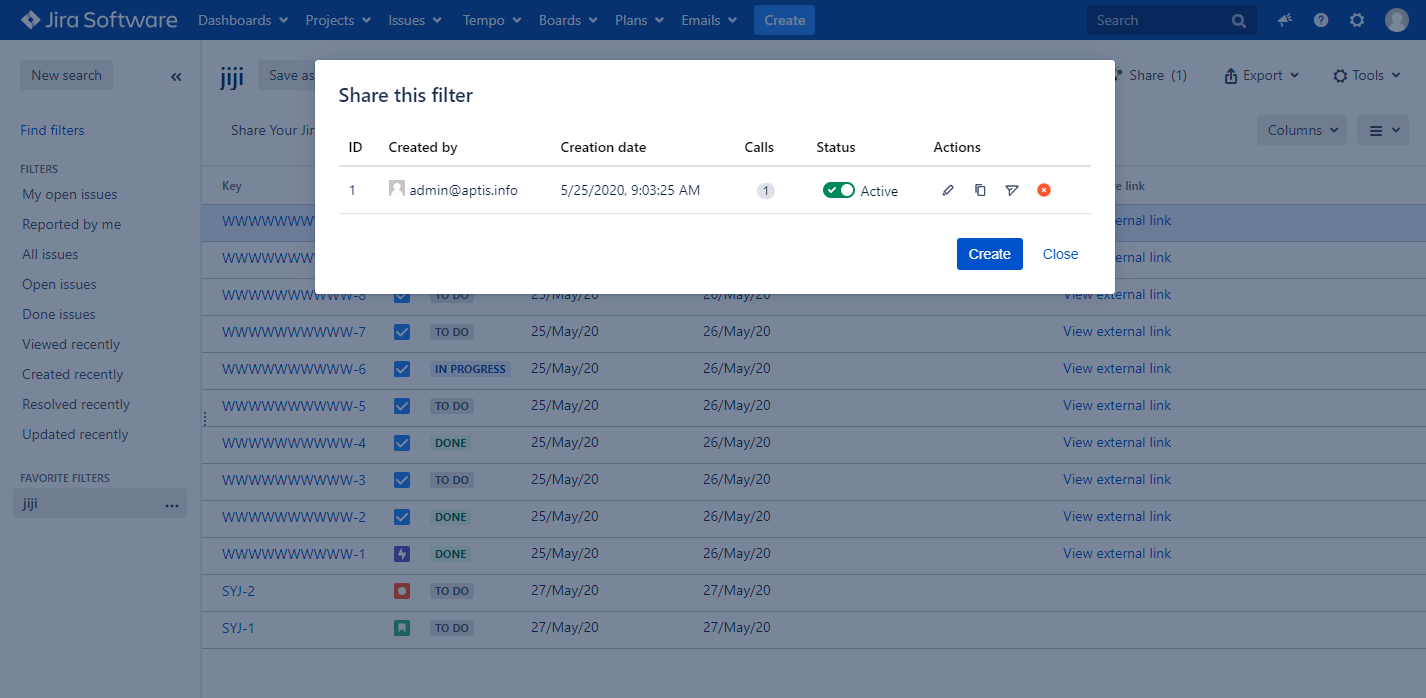
How to configure active shares?
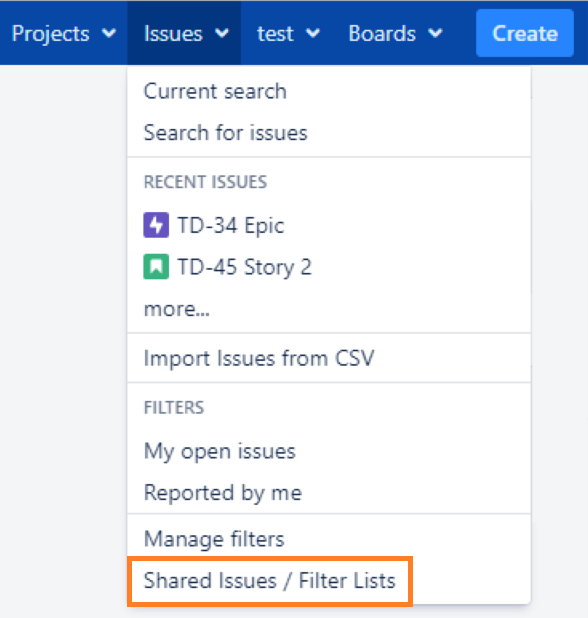
Click on the tab “Issues” and "Shared Issues / Filter Lists" - All active shares will be displayed.
The number of calls and other information are displayed for each share.
Filter the shares or look for a certain one with the search function.
There are several options available for the shares:
-
By clicking on the pen icon, the share can be adjusted
-
By clicking on the copy icon, the link is getting copied to the clipboard
-
By clicking on the share icon, the link can be send to external mail adresses
-
By clicking on the delete icon, the link can be deleted
-
By unchecking the activate toggle, the link can be deactivated
-
By clicking on the amount of calls, the history of the share can be accessed

View a detailed history of each share.